
Tips for Creating the Perfect Gallery Wall
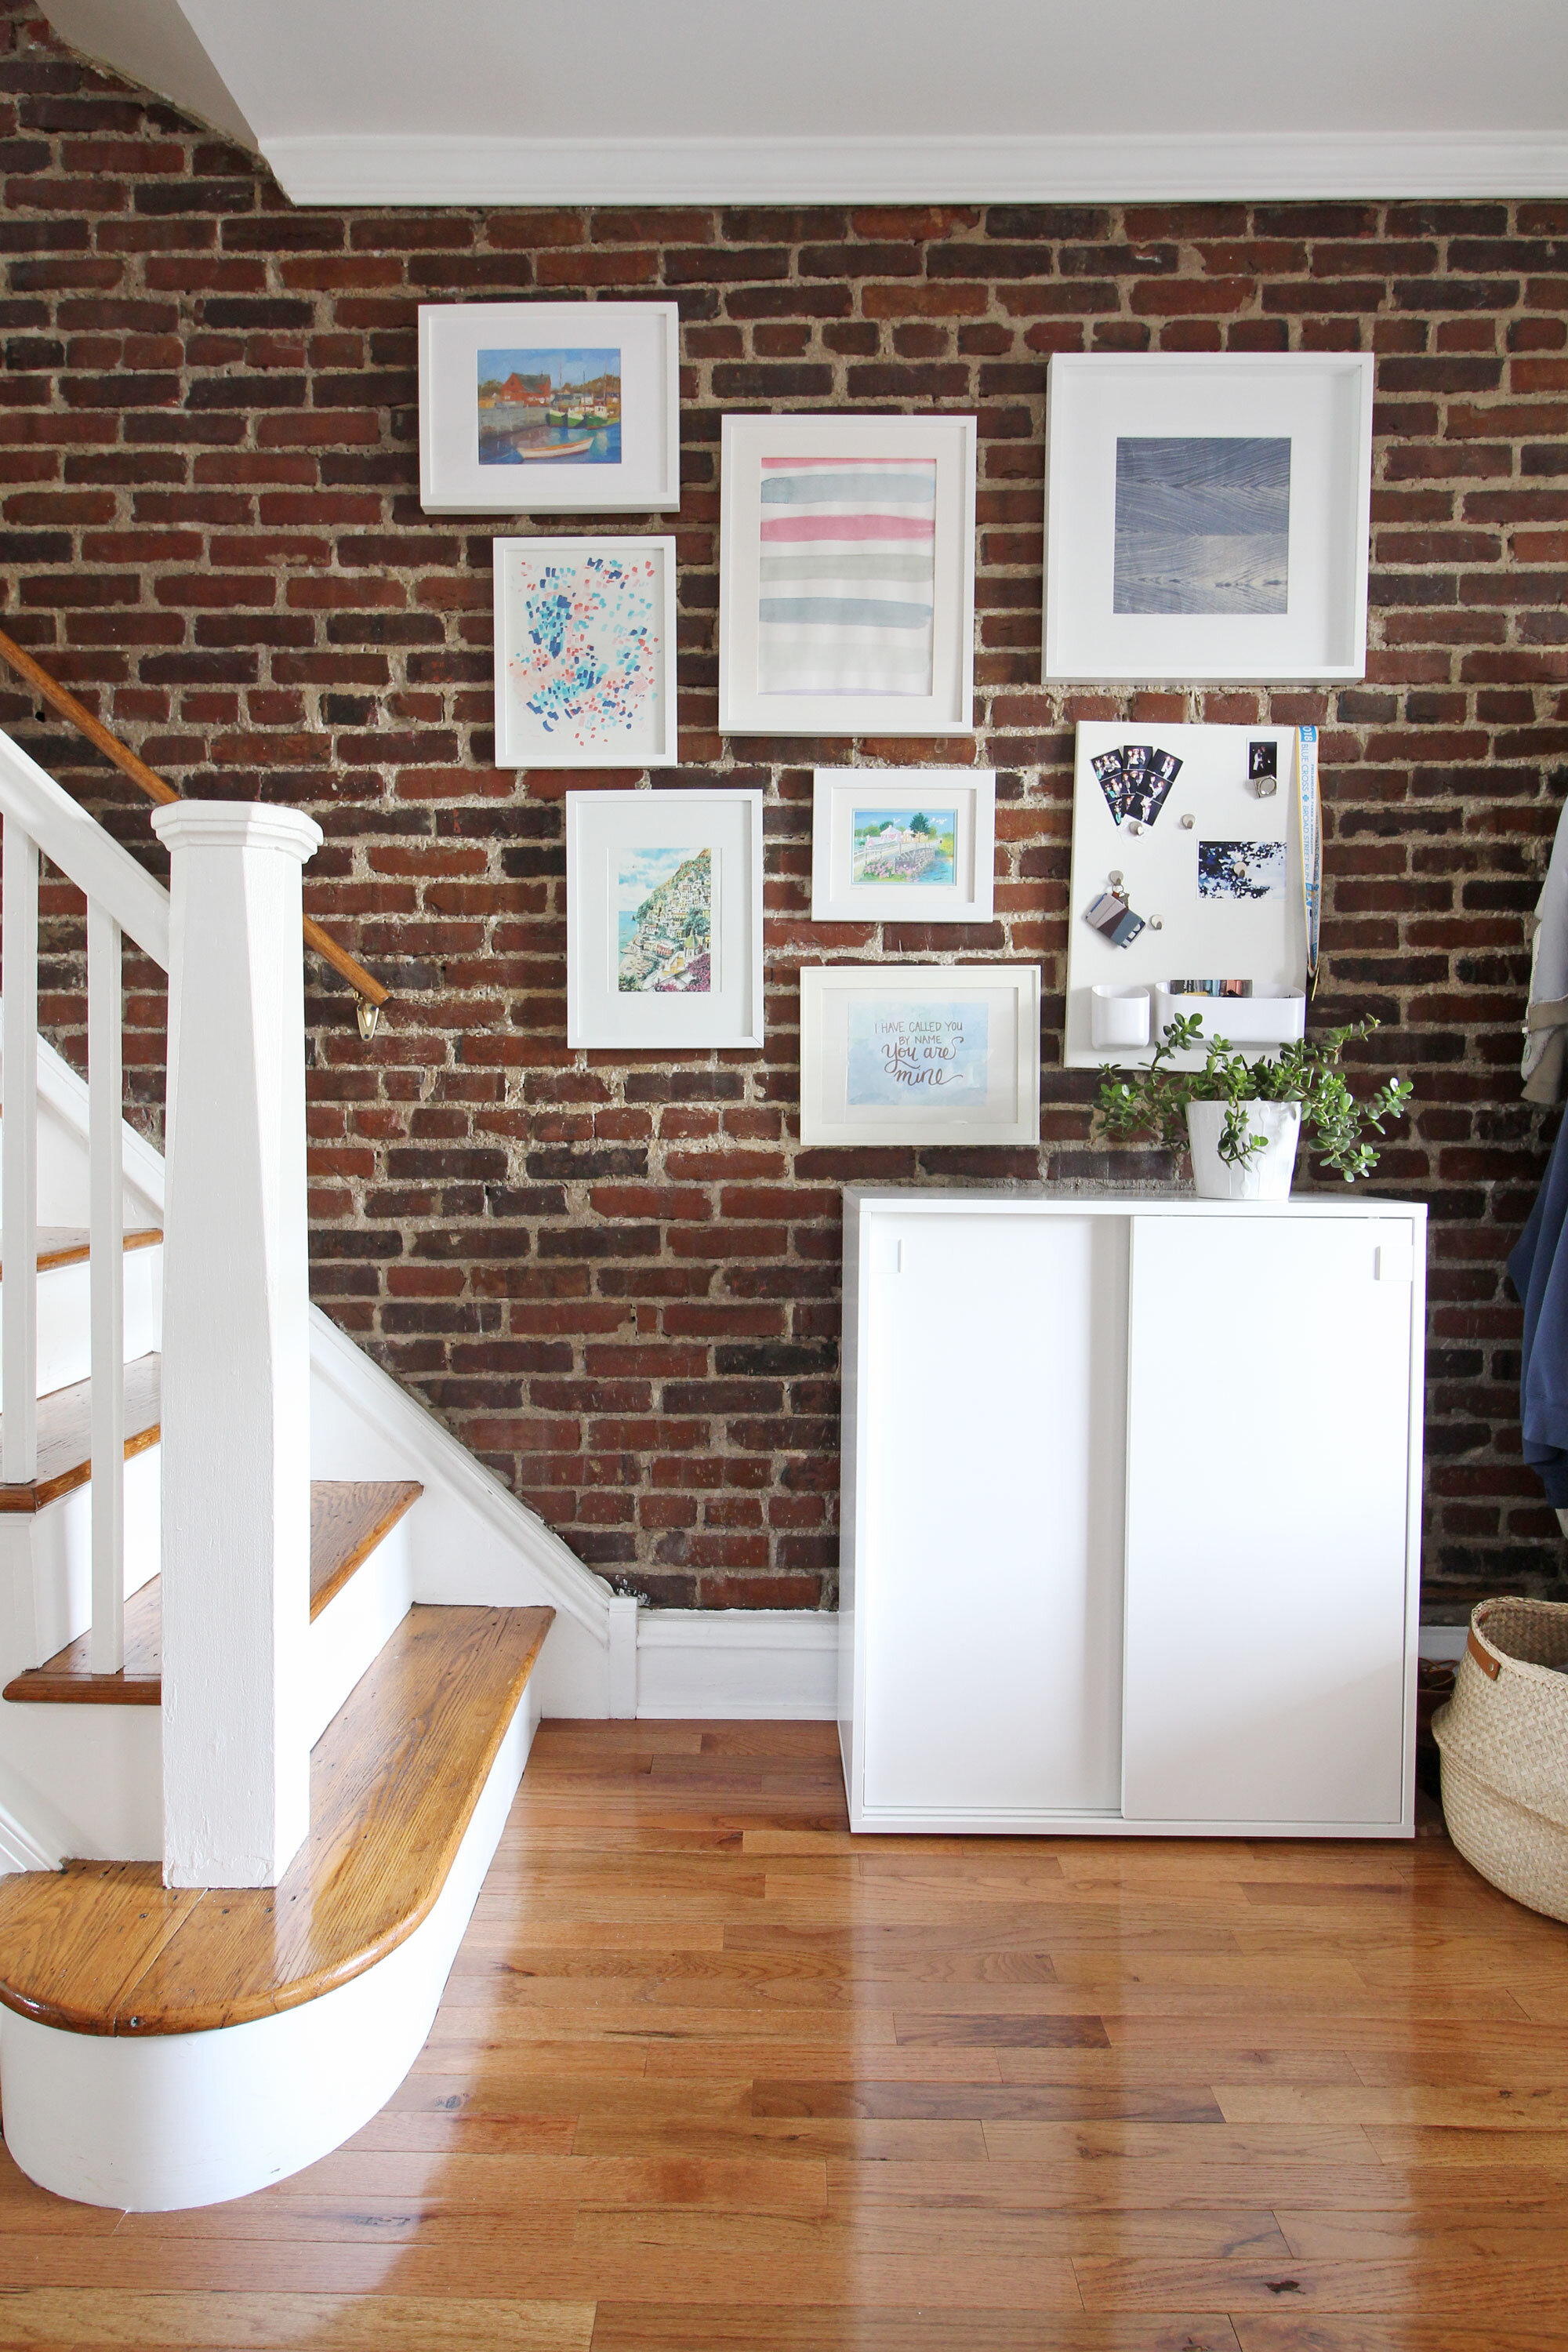
A gallery wall in our Philadelphia home
I LOVE a good gallery wall and apparently, so do many of you! When I “polled the audience” on Instagram a few weeks ago about what you wanted to see here on the blog, gallery walls came up several times - namely, how to put them together in a cohesive way. If you were one of those people, this post is for you! I’ve got four different looks to point you in the right direction along with some inspiration photos and tips you can take with you as you put your own wall together. Be sure to read all the way to the end because I’ve got a bunch of ready-made frames for you to help you get those pieces of art and photos framed ASAP!
Before we get into that though, let’s talk quickly about the case for WHY gallery walls can be a really great option for filling those empty walls in your home:
They give you the opportunity to display a lot of art and/or photos in one place. So if you’re an avid art collector or have a bunch of family photos you want to hang, a gallery wall may be the ticket.
You can fill a big wall in an affordable way. I love large-scale art on a big wall, but sometimes that can get really expensive. A gallery wall allows you to pick up smaller (and typically more affordable) prints or photos and use ready made frames to create a high-impact installation while keeping it budget-friendly.
If you get tired of one piece, you can easily swap it out for another. Perhaps your tastes changed or you found another amazing piece you want to hang - no worries! Just use one of your existing frames and pop that new piece right in there!
So have I convinced you that gallery walls are pretty awesome? Yes? I hope so!
Now, when it comes to actually putting one together, I know it’s not always easy to make it look like the perfectly styled ones you see on Instagram or Pinterest, but fear not! I’ve got four strategies for you that will help you get that look and make you look like a gallery wall pro.
Here are my four favorite no-fail gallery wall setups:
1. The grid:

The grid is your simplest and most straightforward gallery wall (as long as you can get those frames lined up!). It works particularly well for a collection of photos - the sameness of the frames in a grid helps a collection of photos feel cohesive. You can choose full color photos, or black and whites. These can be family photos or any other set of photos you have!
If you’re framing smaller photos or art, I like using larger frames with oversized mats like the example above from Framebridge. It gives smaller photos more presence, and helps a collection look intentional and a bit special. Sometimes those kinds of frames are a little harder to find, but you can always purchase an off-the-shelf frame and have a mat cut to the size you need at any art store or order one online. This is a more affordable option than custom framing.
I haven’t used them personally, but I did some research and found that American Frame will create custom cut mat boards for you in the dimensions you need. You can take a look at all of their options right here!
2. Similar frames in different sizes with a variety of art:

via Kate Arends on Instagram
If you have a collection of different kinds of art and want to use them to create a gallery wall, give them a cohesive look by using similar frames. They don’t have to match exactly, but they should be close (e.g. same kind of wood, all black, or all white) Take this corner gallery wall from Kate Arends for example - she used natural wood and gold frames to bring everything together and it looks beautiful!
By using similar frames, it allows you to focus on the individual pieces of art. The frames sort of become the the backdrop instead of drawing attention to themselves. You can frame some with mats and some without - whatever works best with the individual pieces of art.
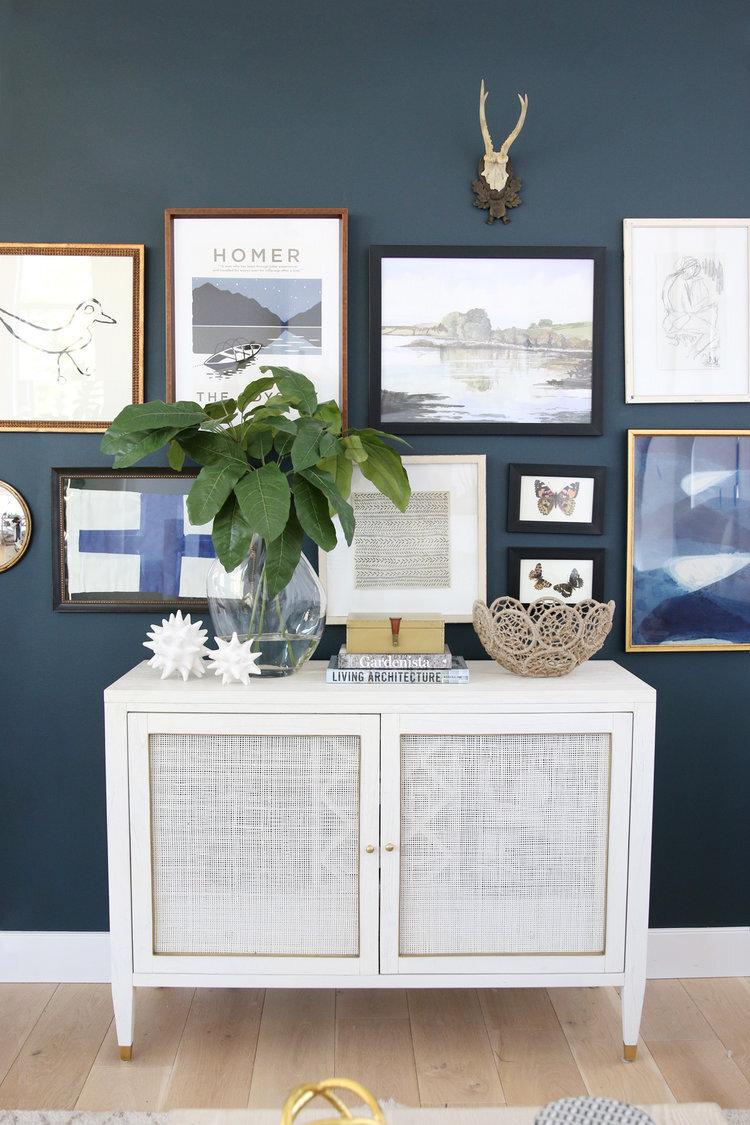
3. Eclectic frames in different sizes with similar art:

via Anthropologie
If you like a more eclectic look, try grouping similar art in a variety of frames like the image above from Anthropologie. The key is to have some sort of uniting feature that pulls everything together. Here, it’s the fact that all of the art is actually pretty similar in style - everything’s a little bit playful and almost has a primitive look to it (in the best way!). Because the art has that similar theme, the mashup of art works beautifully together.
Another way to pull off this look it is to pick pieces that all have similar colors to tie them together. The little gallery wall I shared at the top of this post (the one mounted on the brick wall) is an example of this even though I ended up choosing all white frames for that one. The pieces have lots of lighter colors in common. This grouping came together almost accidentally - I happened to keep collecting and creating art that had similar colors, and one day it hit me that I could hang them all together! I was then able to add to that over time to create a quirky little gallery wall to brighten up our exposed brick wall.
4. The art ledge:

I absolutely love this look and think it’s a great way to incorporate a gallery wall into your home - especially if you find you like to change things up frequently. No new holes in the wall! In this scenario, you mount one long shelf on the wall then place the frames on it so that they lean against the wall. You can go a lot of different directions with this type of gallery wall, which is one of its perks.
To pull this look off well, you’ll want to choose a variety of sizes of frames and art/photos. They can all be the same finish or you can mix it up like you see here, but the key is to vary the heights to keep the eye moving. You’ll also want to overlap some of the pieces to add some more dimension and visual interest. Other than those two tips, you have a lot of freedom here to play around with colors, finishes, styles, and types of art!
via Studio McGee
General gallery wall tips:
Plan it out before you put any nails in the wall. One way to do this is to lay out your arrangement on the floor, take a photo, and then recreate the arrangement on the wall. Another is to cut out pieces of butcher paper in the size of your frames, tape them up, and rearrange them until you’re happy. Then you can hang the frames right on top of them so you get the placement right (take the paper down at the end of course!). You can read more about that method here - Joanna Gaines explains it well!
A good rule of thumb is to hang frames 2-4” apart when possible. I tend to think tighter groupings give you a more polished and intentional look.
Go bigger rather than smaller. Larger frames typically work better than a bunch of tiny ones. One mistake I see a lot is when folks group a lot of small frames together, but spread them out to cover more territory and then wonder why they don’t look right! If you only have smaller pieces of art, mats are your best friend! A larger frame with a mat will give you a bigger piece to work with.
Unite an eclectic gallery wall with a common theme or color. I talked a little bit about this earlier in the post, but it’s worth pointing out in general as well. Though I’ve seen some amazing gallery walls with a very wide variety of colors and styles, it’s harder to do well, so if you’re a “gallery wall beginner,” sticking with a more cohesive collection from the get-go will help you create a look you really love.
Ready-made frames I love:
There are so many frames out there and sometimes it’s hard to know where to start. I’ve got a few favorites to share with you so you can narrow your search and focus on the good stuff - the art or photos you’re planning to hang! Also, know that a lot of these frames come in multiple colors/finishes, so you’ve got more options than what you see here!

So that’s what I’ve got for ya on gallery walls! Do you love them as much as I do? Do you have any in your home? Which kind is your favorite? Feel free to chime in in the comments below!
*This post contains affiliate links, which means Mix & Match Design Company earns a small commission from your purchase at no cost to you.