
One Room Challenge Week 5: Lounge Space Progress
Welcome to week 5 of the One Room Challenge! If you're new to this whole thing, here's a quick intro: Linda, of Calling It Home, invites bloggers to participate in a six week makeover challenge twice a year, and this time around I decided to jump in as a guest participant! I'm giving my home office (AKA the Mix & Match Design Company headquarters) a fresh start. Feel free to go back to Week 1 (the "before" and inspiration images), Week 2 (the design plan), Week 3 (workspace progress), and Week 4 to catch up on what's been happening.
Things are really starting to come together in my home office! We're coming in for a landing, and I can't wait to show you the full reveal next week. Before we get there though, let's talk a little bit about the non-workspace part of the room: the lounge. As I've mentioned before, the term lounge is a bit generous considering that it consists of a comfortable chair and a spot for the TV, but it is designed as a place to relax and catch up on the occasional Netflix show, or watch a football or baseball game.
Over the past week, I've been working hard on my to do list for this area. Though the list wasn't too long, I found that a lot of the tasks were more time-consuming than I thought they would be and it came down to the wire to get it done so I could shoot it for this week's post.
Here's what had to happen to whip this little space into shape:
- Clean out the random stuff pile that had accumulated in the corner between the chair and the closets. (It had become the spot in our house where anything that didn't have a home ended up. I know we can't be the only ones that have a corner like that!)
- Remove the old rug and put down the new overdyed blue one* (it's so pretty!).
- Hem the curtains (I first talked about those in last week's post).
- Get the console table situated with the TV and style it.
- Frame and hang art and photos.
The photos below show where we are now. I'll be sharing these smaller vignettes this week, and with the big reveal next week, you'll be able to see it all together!

This corner is so cozy now with the comfy chair, snazzy brass and marble side table, and art on the wall behind it. You can catch a glimpse of the new overdyed blue rug too - it's the perfect size and style for the room. I was hoping it would be the magic piece that would pull the room together, and it is! It united the work and lounge spaces even better than I could've imagined. It's super soft underfoot as well, which our dog has discovered, and his new favorite activity is rolling around on it while he's playing with his toys. It's hilarious to watch!

I knew the little piece of wall in the corner needed some color, and two smaller pieces hung vertically were a perfect fit for that tall, narrow spot. The top one in the floating frame is a print from Modern South Studio (one of my gal pals on IG), and the bottom one is a piece I snagged when my parents were cleaning out their basement! #free
I framed them both in my favorite thin brass frames from Target. They look so much more expensive than they are! Sadly, I think they may be discontinuing them because I've been been having trouble finding them online and last week I saw they were on clearance in store (get 'em while you can!). If brass isn't your thing, they also come in silver as well.

I also wanted to share a shot of the double closets with the new curtains all hemmed and hung. I'm thrilled with how they came out - no more sad sighs at the sight of ill-fitting bifold doors! The curtains are from H&M, and are a lightweight blue-gray cotton. I love that they come in a 96" length, which is perfect for a lot of windows if you're hanging them high and wide above the frames. Obviously, I didn't need the 96" length in this circumstance, but it's good to know for the future. They're semi-sheer, so if you're interested in buying them for yourself, make sure that's what you need! These would look SO GOOD doubled up on each side of a window.
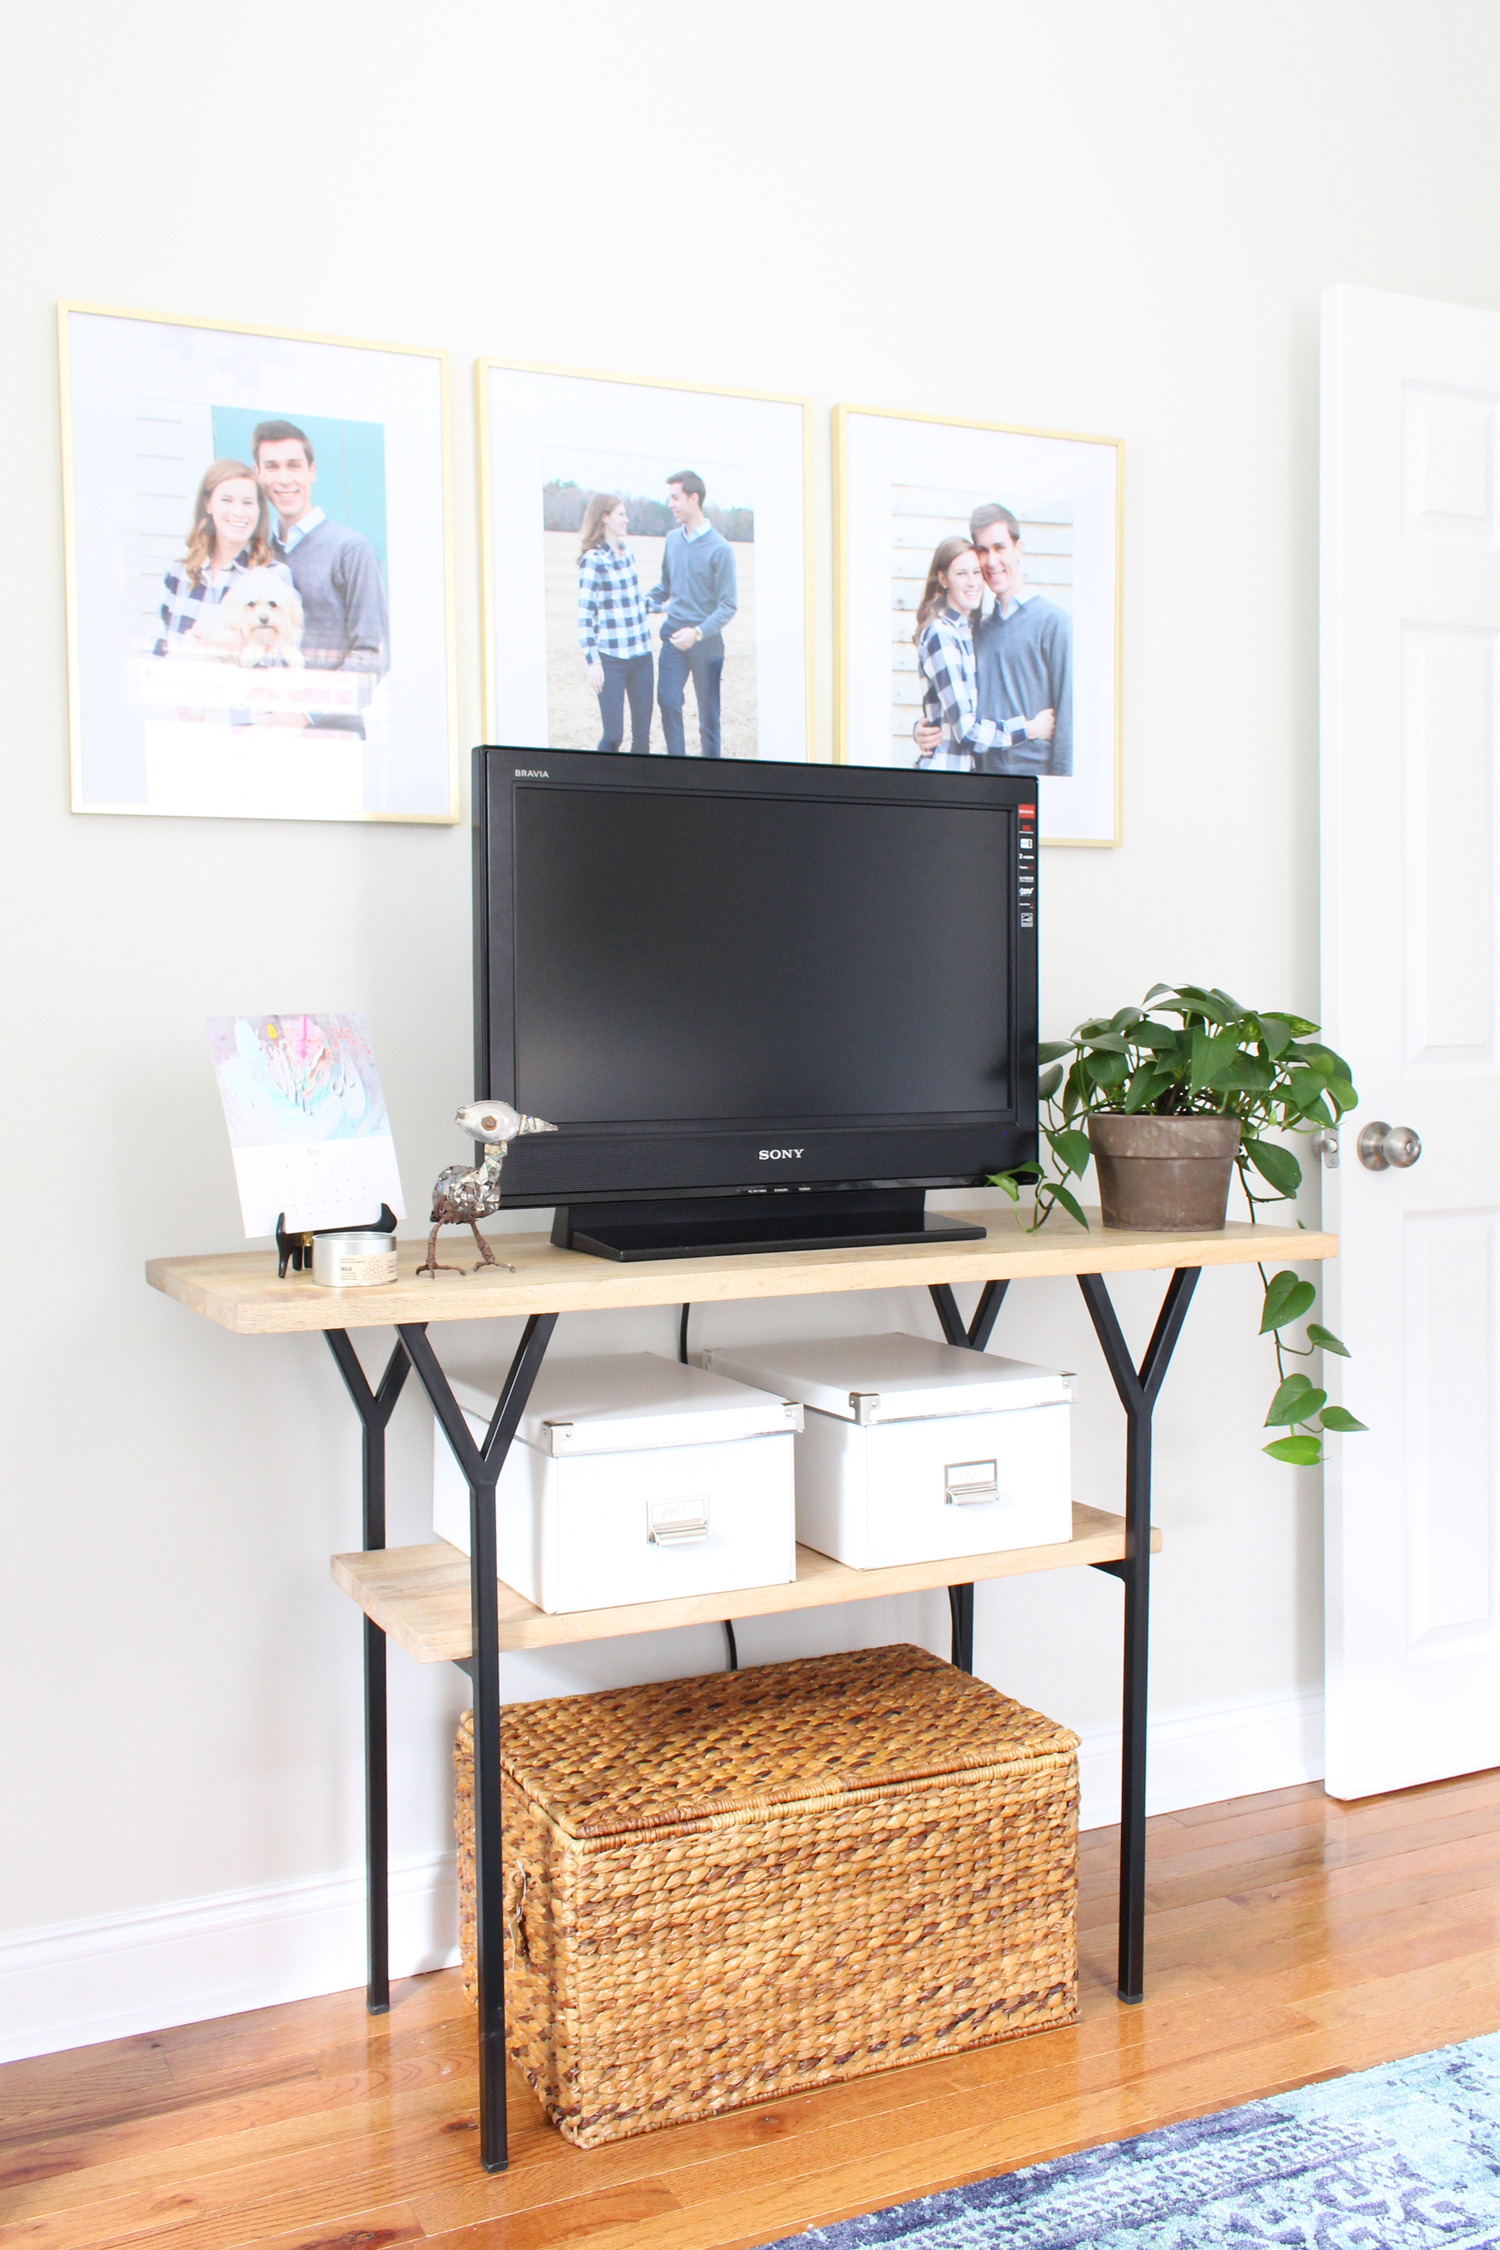
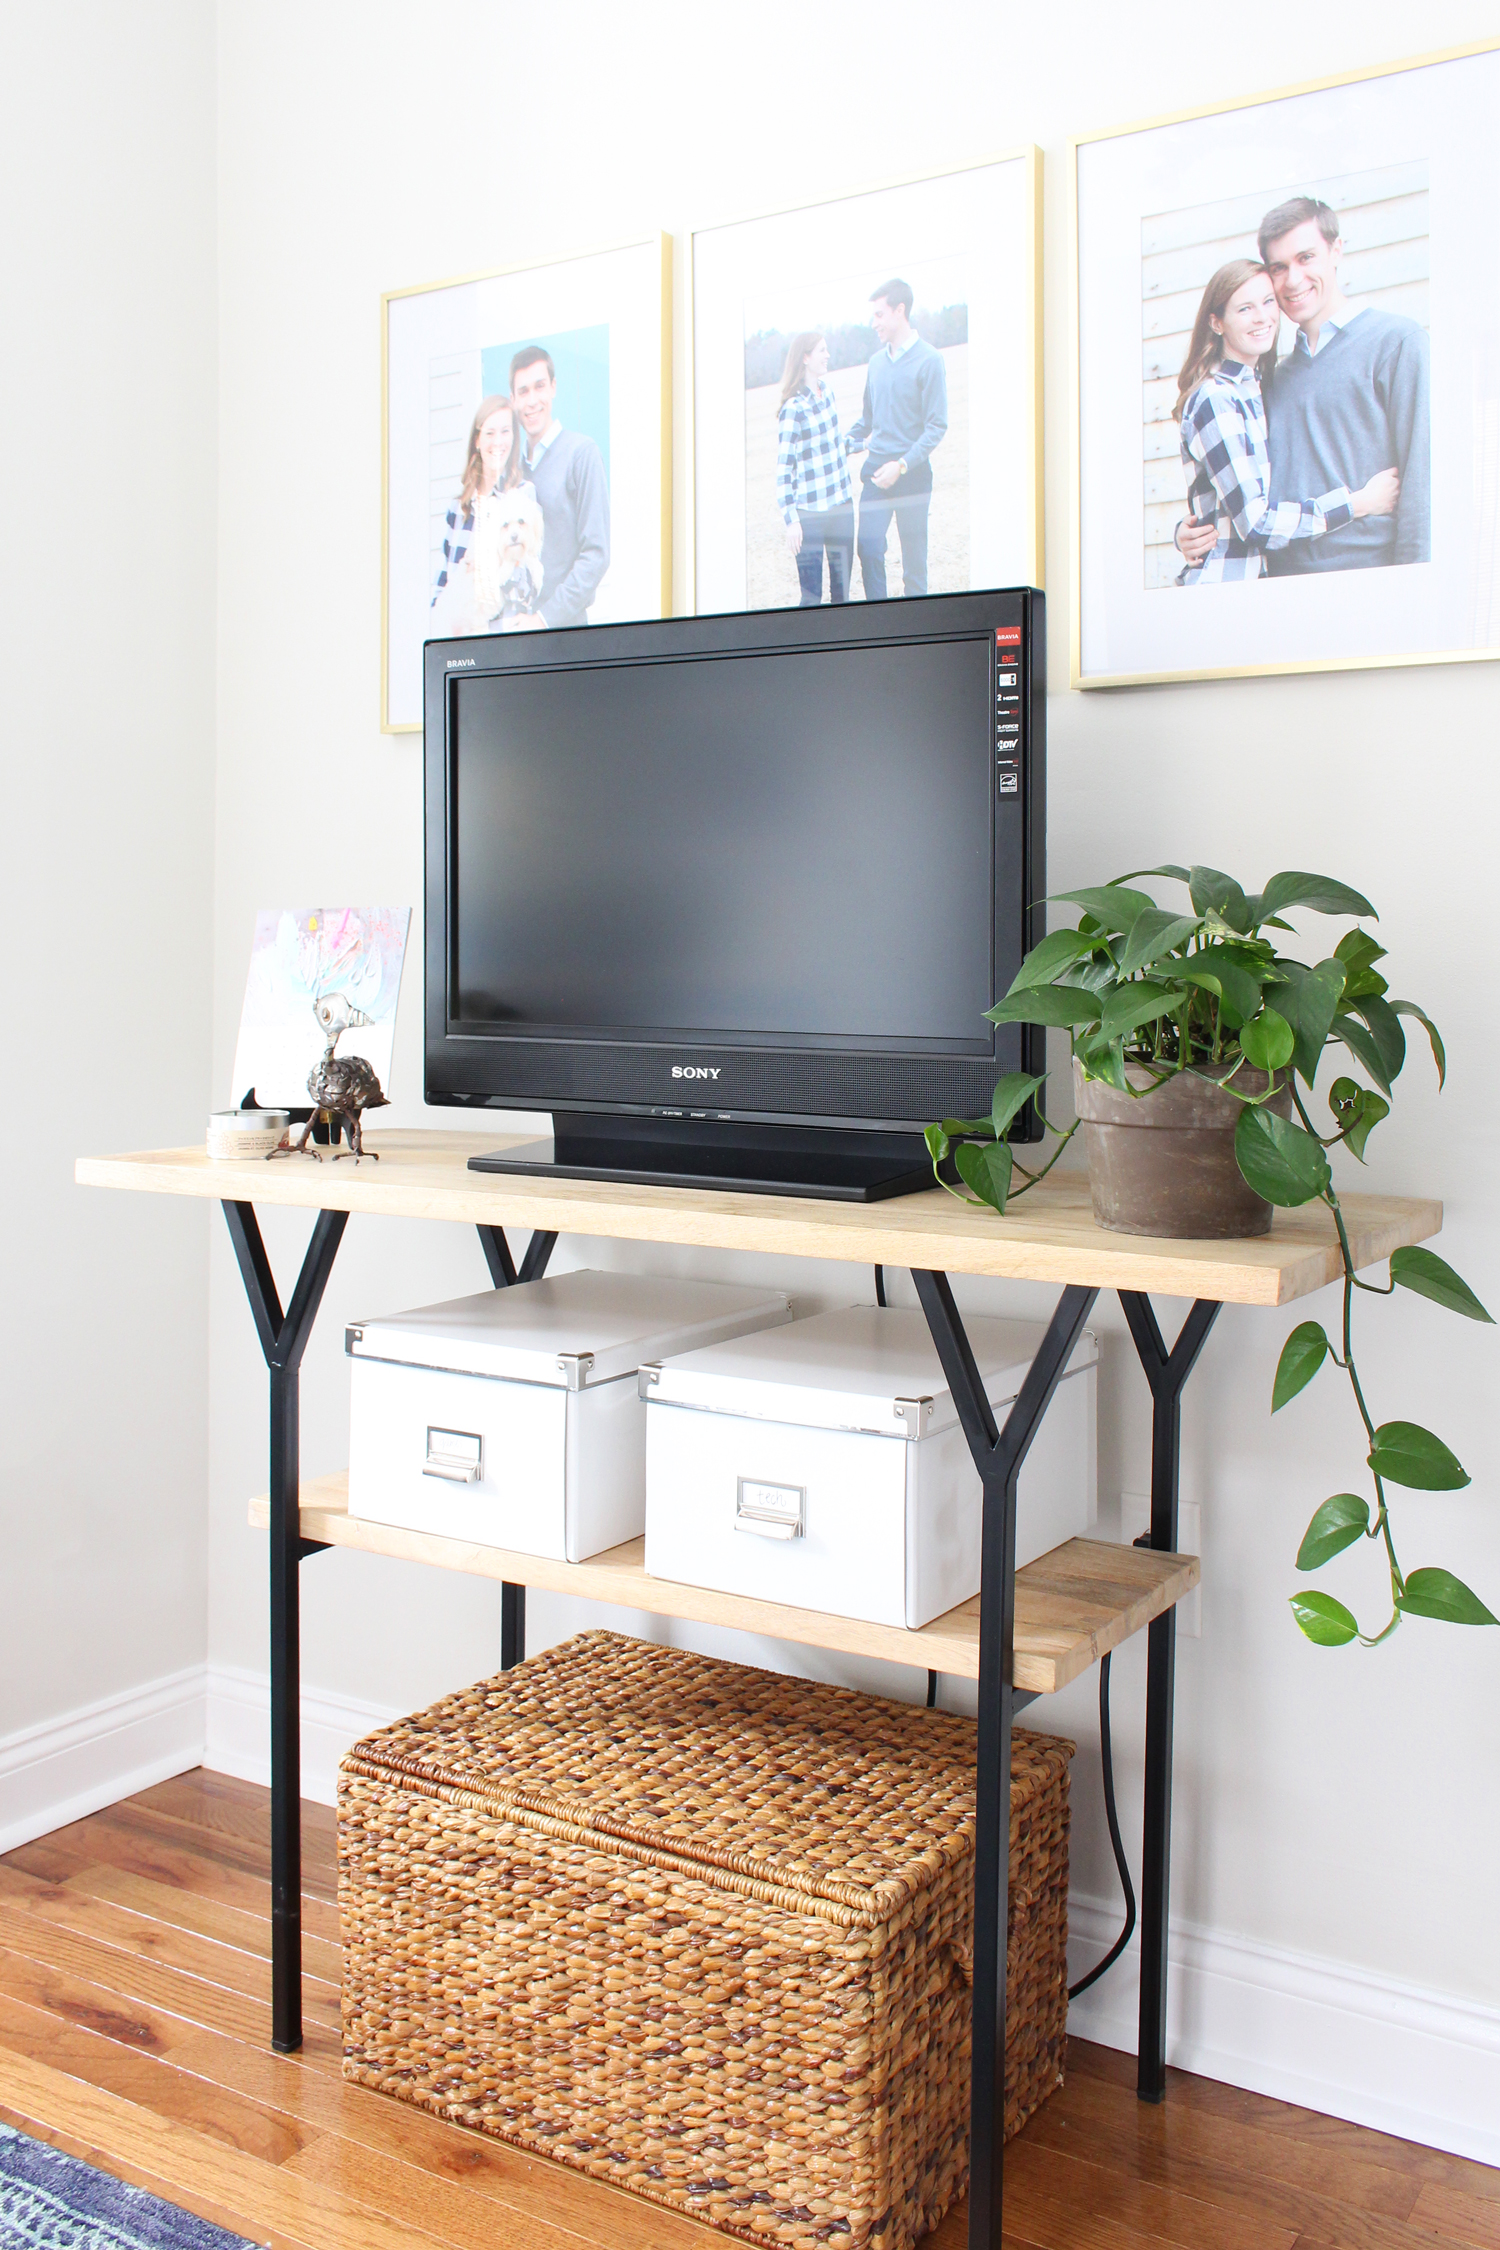
Now let's move over to the console side of the room! If you've been following along, you might remember that back in Week 2, I mentioned that I snagged this console table from HomeGoods, but that I wasn't sure the tone of the wood would be right for the room. I debated whether to stain it darker, paint it white, or leave it as is. I was really leaning toward staining it darker, but now that I see it in context with everything else in the room, I'm actually liking it in its natural state! I'm going to live with it for bit and we'll see if it stays like that in the end.
I was also debating what I should put in the frames above the TV, and thanks to all of your input on my Instagram Stories a few weeks ago, I decided to go with photos! I had three printed of my husband and me from one of my favorite photo shoots we did a couple of years ago out in the country. My mom shot them - she's definitely got an eye for photography!

I used the same brass frames as in the corner with the chair (these are 16"x20" with an 11"x14" matted area), and I love how the blues in the photos play with the brass.

I'm still playing around with the styling on this console table, but I do love how my pretty little Emily Jeffords Paint Palette calendar looks here. That funky metal bird is from a trip to Kenya, and I picked up that little candle when we were in London a few weeks ago. It smells so good!

So that's where we are on this half of the room. Stay tuned for next week - it's reveal time, y'all! Can't wait to have this project finished and all ready to go for it's big moment!

*This post contains affiliate links. That means when you buy through my links, I'll earn a small commission from your purchase at no cost to you. Thanks for supporting Mix & Match in this way!